Crafty Inspiration at Your Fingertips!
Navigation
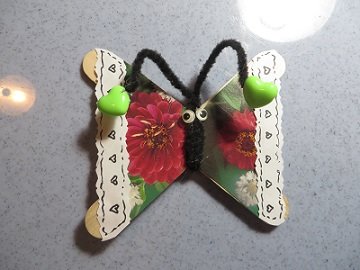
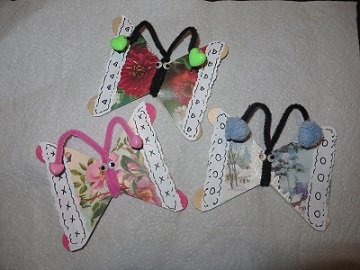
Greeting card Butterfly
by Jeanine
(South Dakota)

greeting card butterfly
Let's recycle some greeting cards and turn them into a beautiful greeting card butterfly!
Materials needed:
- greeting card front
- 2 jumbo craft sticks (colored or plain)
- 1 chenille stem (your choice of color)
- 2 beads or poms for the antennae ends
- two 7mm movable eyes
- white paper, black or colored Sharpie marker
- hot glue gun
- regular scissors and decorative cutting scissors
Directions to make a greeting card butterfly:
1. Hot glue the craft sticks into an X shape.
2. Use the front part of the greeting card only. Lay the X onto the back of it, hold it up to a lamp so you can tell where the design will be on your X - try not to get any words in the design.
3. Lay it down and carefully trace around the top & bottom of the X and draw a line between the top and bottom of the sticks at their ends to complete the wing shape. If your card is too small, you may have to do this with 2 triangle pieces instead and have the cuts meet in the middle, which will be covered by the body.
4. Cut the card and glue it to the X.
5. With decorative scissors, cut 2 strips of plain white paper to make the "lace" trim for the ends of the wings.
6. Hot glue that in place and then trim the excess at the top and bottom.
7. Use a Sharpie marker and draw some simple designs onto the white "lace".
8. Place the chenille stem so there is approximately 3 1/2 inches above the middle of the butterfly and wrap it around the middle 2 times. This will leave the other end about the same length as the first end. Twist the 2 ends of the chenille together at the top of the head.
9. Hot glue the movable eyes in place.
10. Put a dot of hot glue on each end of the antennae to attach either a bead or pom pom.
Comments for Greeting card Butterfly
|
||
|
||
Would you consider a small donation?
You will receive my craft ebook as a thank you!
Every little bit helps! If you are enjoying this site, would you consider making a small donation? I use the extra money to help with the cost of craft supplies! With any $5.00 donation or more, you will receive my 650 page ebook full of 178 craft tutorials from this site. Thank you for your consideration!
Click here to learn more about the book, and to make a donation.


