Painted String Art Butterflies
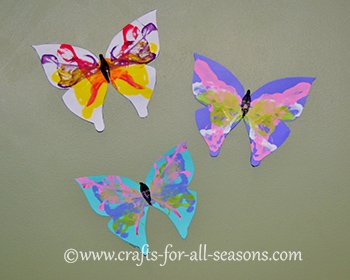
Remember painted string art? It kind of comes out like a Rorschach ink blot. This a fun project that children like because when you unfold that paper, you never know how your creation is going to look.
I had a lot of fun introducing this method of art to my kids, and I know they loved it too.
Here I provide a butterfly printable. You just cut it out, and follow the instructions for dipping a string in paint. The string is laid out carefully on one side of the butterfly. The string is threaded through a hole in the center of the butterfly. Fold the butterfly in half, and pull the string! Open up the paper and look at the beautiful design you will discover.
We cut out our butterflies and they are now adding some spring beauty to our back window.Materials Needed for Painted String Art Butterflies:
- Butterfly Pattern, available by clicking here
- Card stock
- Scissors
- Paints
- String
Instructions for Painted String Art Butterflies
1. Begin the painted string art by clicking on this butterfly pattern
to open up the PDF
butterfly printable. Print this pattern out on a
piece of
card stock. You can use white, or try some different colors.
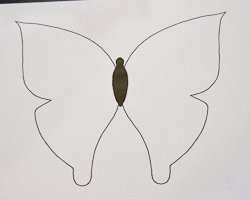
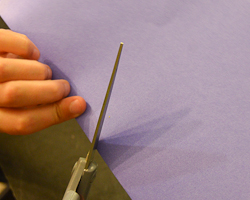
2. Fold the
butterfly in half, and cut a small hole in the center of the
butterfly's body.

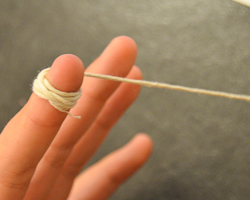
3. Open up the butterfly and set it aside. Cut a piece of string about 3 feet long. The goal is to coat this string in paint. Different colors look great! For our butterflies, I used three different paint colors on the same string. The easiest way I found to coat the string is as follows: Pour three different colors of paints in little cups (I used a little paint palette we had). Wrap a section of string around your finger, and dip this into the first color. Use some type of tool (like a qtip or toothpick) to push the string down completely in the paint so it is covered.
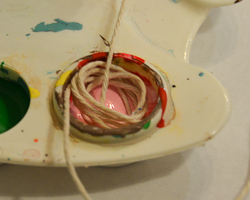
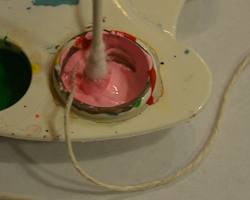
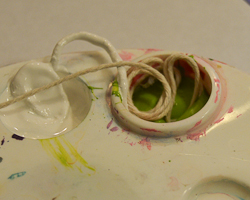
4. Next, take another section of clean string and wrap it around your finger again. Dip that section in a new color of paint, leaving the first section still sitting in the first color. Below you can see the first section is in the white paint and the second section is in the green paint. Finish up with rolling up the last section in a third color. Leave at least six inches of the string paint free so you can handle it.
5. Pull out the
string from all the paint colors. Gently lay the string on
one side of the butterfly wing, and let it fall gently in different
directions. Include a few loops and cover all areas of the
wing.
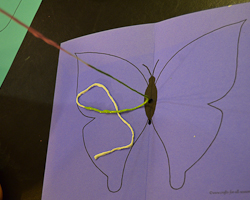
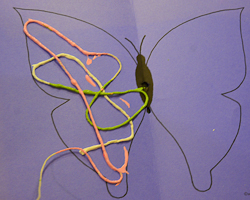
6. Now get ready for the fun part. Thread the string through the hole you made in the butterfly body.
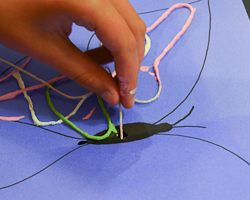
7. Fold the paper
in half. Use your dominant hand to get a strong hold of the
string. Use your other hand to press down firmly on the
paper, keeping everything flat. Then, pull the entire string
out, quickly but smoothly.
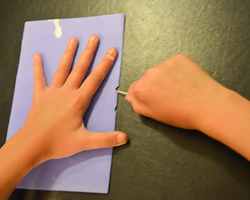
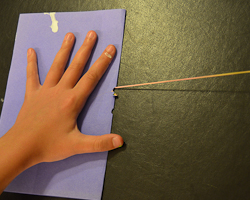
8. Throw away the string, and unfold your paper to reveal your
butterfly!
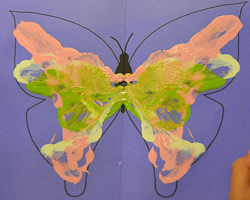
9. Allow the butterfly to dry. Cut your butterfly out if you wish. You can also use black paint or a Sharpie to color the butterfly body black again.
Would you consider a small donation?
You will receive my craft ebook as a thank you!
Every little bit helps! If you are enjoying this site, would you consider making a small donation? I use the extra money to help with the cost of craft supplies! With any $5.00 donation or more, you will receive my 650 page ebook full of 178 craft tutorials from this site. Thank you for your consideration!
Click here to learn more about the book, and to make a donation.
Home › Valentine's Day Crafts › String Art Butterflies
Home › Preschooler Crafts › String Art Butterflies
Home › School Age Kid Crafts › String Art Butterflies


Facebook Comments
Have Your Say About What You Just Read! Leave Your Comments or Questions Below.