St. Patrick's Day Wreath
This St. Patrick's Day wreath is very easy to make.
It doesn't cost much money and you only need a few items. It will look very festive hanging on your front door!
Craft stores sell grapevine wreaths, all ready for you to decorate. With all the variety of ribbons that are available, you should be able to find several for St. Patrick's Day. The little shamrocks that are on the wreath are actually made from chenille stems.
Materials Needed:
- One grapevine wreath
- One bunch of green silk leaves (I used ivy)
- 8 to 10 long green chenille stems (pipe cleaners - I used the sparkling kind)
- 8 to 10 floral picks
- 3 yards of wired St. Patrick's day ribbon
- Twistie tie or floral wire
- Hot glue gun
St. Patrick's Day Wreath Instructions
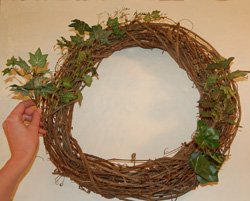
1. Begin the St. Patrick's Day wreath by cutting apart individual stems from the bunch of silk leaves. Insert these along the grapevine wreath. Concentrate more leaves near the bottom and sides, and not as many on top. This gives the effect of the vine growing upwards. You can hot glue the leaves in place for extra support. Check the photo of the finished wreath to see the placement of the leaves.
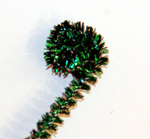
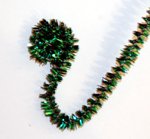
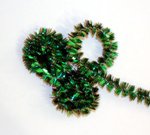
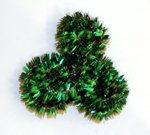
2. Next, make your chenille stem shamrocks. To start, take a long chenille stem and begin to roll it in a flat spiral, to make one of the three clover leaves of the shamrock. After you have one leaf done (about 3 rotations), bring the chenille stem across to the other side (as shown below) and begin the next spiral. When that one is done, bring it to the middle to do the next spiral. Don't worry if it looks messy on this side with the overlapping pipe cleaner, because this is the back of the shamrock. When you turn it over it will look great.
.
3. Once the shamrock is made, wrap the wire of a floral pick around it. I like to leave a little wire unwrapped to allow the shamrock to "wiggle" a little, or stand out slightly from the wreath.
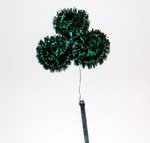
4. Place the floral picks with the shamrocks throughout and around the wreath. Play around with placement to get the best look. You can hot glue the floral picks into the wreath for good support.
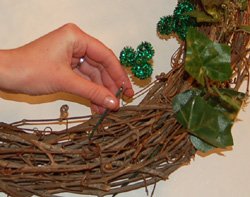
5. Next it is time to make the bow. Using about 3 yards of wired ribbon (or longer if you want it fuller), make a "half" loop and pinch together with your finger (see photo). Leave about 7 inches hanging down for the first tail of the bow. The "half" loop will be about the size of one half of the bow.

6. Next, twist the ribbon over to make sure the right side of the ribbon is pointing out, and make a loop about the same size on the other side. Meet the ribbon again in the middle and pinch with your fingers.

7. Continue to make loops, each one smaller than the next. I was able to do three loops on each side for the bow pictured here.


8. Finally, insert a twistie tie or a wire around the ribbons where you are pinching.

9. Fan out the bows. Here's a picture of the completed bow.

10. Use wire or a twistie tie to attach the bow to the wreath. You can do this by wrapping the wire around one of the sturdy grapevine branches of the wreath.
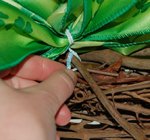
9. Wrap a small piece of wire around one of the back branches of the grapevine wreath to make a loop for hanging. The St. Patrick's Day wreath is now ready to hang on your door.
Would you consider a small donation?
You will receive my craft ebook as a thank you!
Every little bit helps! If you are enjoying this site, would you consider making a small donation? I use the extra money to help with the cost of craft supplies! With any $5.00 donation or more, you will receive my 650 page ebook full of 178 craft tutorials from this site. Thank you for your consideration!
Click here to learn more about the book, and to make a donation.
Home › St. Patrick's Day Crafts › St. Patrick's Day Wreath
Home › Crafts for Adults › St. Patrick's Day Wreath


