Quilled Shamrocks
These quilled shamrocks are inexpensive and fast to make.
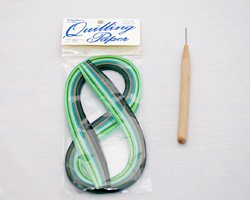
Quilling is surprisingly easy, especially with the pre-cut quilling papers readily available in the craft stores. Pick up some green quilling paper and a quilling tool and you have almost everything you need to make these cute earrings for St. Patrick's Day. My wooden handled quilling tool cost me $1.77 and the pack of green quilling paper cost me $2.17 at my local craft store.
I can make dozens of earrings from this one pack. The shamrocks can also be made into a necklace, or attached to cards and gift tags. Have fun!
Materials Needed:
- Green quilling paper
- Quilling tool
- White glue
- Clear acrylic craft spray (optional)
- Strong adhesive, such as E6000
- Post earring findings and backs
- Small flat-sided gem for the middle of the shamrock
Instructions for Quilled Shamrocks
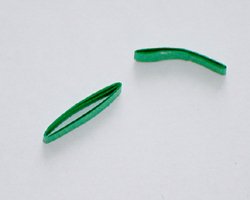
1. Below is a photo of what the quilled paper and a quilling tool looks like. Begin the quilled shamrocks by measuring and cutting twelve sections of green quilling paper at 10 cm in length.
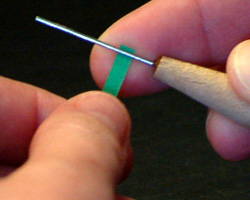
2. Begin by placing the very end of one of the paper against the quilling needle, as shown. Hold it in place firmly in the back with the pad of your finger.
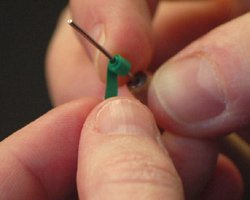
3. Now, begin tightly wrapping the paper around itself. You may want to do a few practice ones first. Once you try a few you will see it is pretty easy to get the hang of. Keep the paper tight around the needle by consistently holding tension on the roll with your thumb.
4. Once you have made a tight roll to the end of the paper, slip it off the needle. Then, let go of the tension on it and let it open and relax a little. If you are into quilling, you may already have a quilling board. This is a board with measured cut out holes that you can place the relaxed rolls in so they will all be the same size.
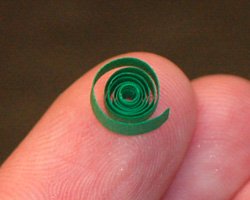
5. Add a tiny amount of white glue to the inside end of the paper and press it against the roll to complete the circle.
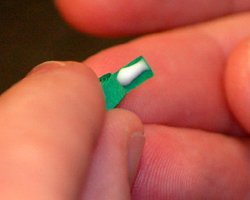
6. Next, pinch the roll to make a teardrop shape.
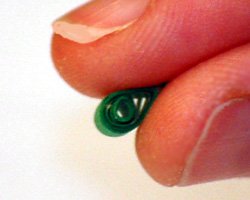
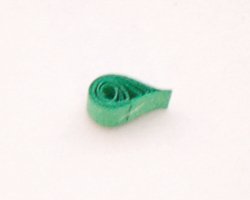
7. Repeat this for all the sections of paper, so you get 12 quilled teardrops. They should all be around the same size since you began with 10 cm lengths.
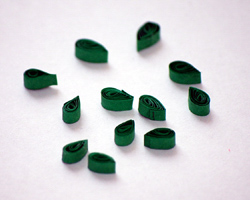
8. Next, glue the teardrop shapes together to create six little hearts, as shown.
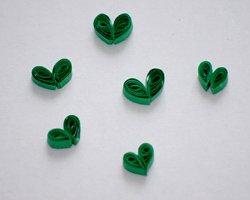
9. Make a stem by taking a length of quilling paper (I used a 5 cm length) and fold it back upon itself a few times. Mine came out to be 1.5 cm long, but adjust the stem length to your liking.
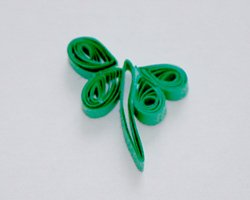
10. Glue two hearts to the sides of the stem with white glue as shown. Then, put a drop of white glue on the top of the stem and add the top heart. If some of your hearts did come out sized a bit differently, use your largest heart for the top.
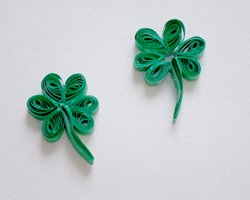
11. At this point, I sprayed my shamrocks several times with a clear acrylic craft spray to protect them, and allowed them to dry in between coats.
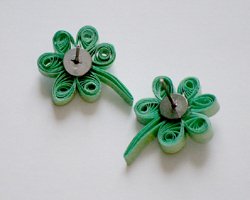
12. Once dry, use a strong adhesive such as EC6000 to glue a earring post back to the back of the shamrock.
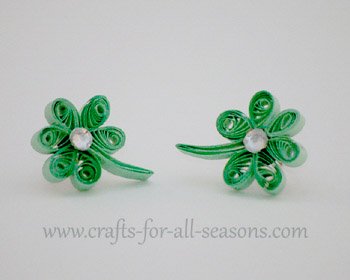
13. On the front use the strong adhesive to glue a tiny flat sided gem or pearl to the center of the shamrock.
Would you consider a small donation?
You will receive my craft ebook as a thank you!
Every little bit helps! If you are enjoying this site, would you consider making a small donation? I use the extra money to help with the cost of craft supplies! With any $5.00 donation or more, you will receive my 650 page ebook full of 178 craft tutorials from this site. Thank you for your consideration!
Click here to learn more about the book, and to make a donation.
Home › St. Patrick's Day Crafts › Quilled Shamrocks
Home › Crafts for Teens › Quilled Shamrocks
Home › Crafts for Adults › Quilled Shamrocks


