State String Art
Cleveland, Ohio art
These string art pieces are for sale on my Etsy store!
String art is back folks. Popular in the 70's but now we are seeing it everywhere these days - even at Target.
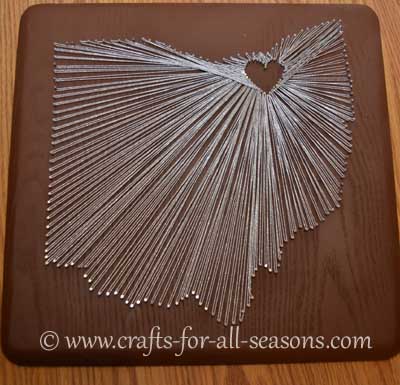
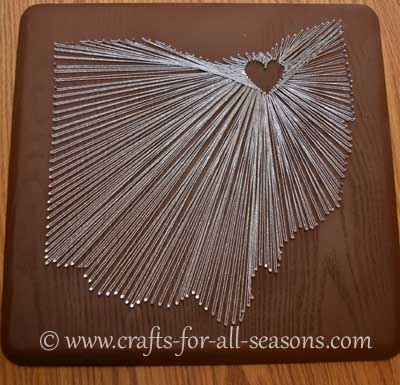
This tutorial is going to describe the top left photo above, the state of Ohio. But the tutorial can be followed to make any type of string art - only the pattern changes.
I was looking for a piece of art to place on our side wall in our main foyer. The wall space is small but a square piece of work is what I needed. I came up with this tutorial myself... but since the actual idea is not mine I wanted to hunt down some original sources. I did find Moriya from The Harpster Home blog... she has a complete tutorial and great photos. I'm not sure if she was the first to come up with this or not, but it was her photo with a heart around the city that made me want to make one of these for Cleveland, Ohio. I really found myself enjoying her blog, and laughing out loud. She has a wonderful sense of humor, and some great DIYs for the home. Check our her blog, you won't be sorry.
I will post here what I did to make this, and you can compare with Moriya's tutorial. Hopefully you'll get some tips from both sources to make this state string art project go smoothly.
Overall, I did not think this state string art project was hard. It was fun! After I had the wood sanded and painted, the actual nails and string art took about two hours. Not too bad I thought.
Materials Needed:
- A piece of finished painted wood, the size you want your art to be.
- Access to a computer and printer (to print out the map).
- A box of small nails, I used size 1/2 inch by 19.
- Pretty string, I used silver cord by Darice.
- Scissors
- Hammer
- Hardware for hanging the art
State String Art Instructions
1. To begin the state string art, you need to find the right size base. You will want to cut a piece of wood to the size of the art desired. The shape of the wood (whether it is a square or a rectangle) depends on the shape of the state you are making. For Ohio, I needed a square. It looks best if you can finish the edges with a router. The wood I used was actually the wooden seat from a chair! It happened to be just the right size wood I needed, and it was already finished.
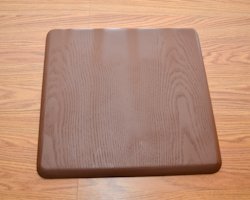
2. On the back of the wood, install the picture hanging hardware so you can hang up your piece when you are finished. You need to put this one before you begin because it will be too difficult to add it once you have all the nails and string art in place on the other side.
3. Leave the wood natural and stain it, or paint it a solid color. Whatever you choose. I painted the wood with brown spray paint and allowed to dry.
4. Next you will need to print out a map of your state. To do this, first do a Google image search for your state. Choose one of the bigger images and right click on the photo to save it to your desktop. If you are savvy on the computer, you can use a variety of programs (Microsoft Word, Photoshop, Scrapbooking or card making software) to make the image the size you want and to print it as a poster (on multiple sheets). If this seems confusing for you, here is a very easy option. Download the free PosteRazor software. I love this software and use it often. It easily allows you to print off an image much larger on multiple sheets of paper. Then, you tape the pieces of paper together to form a poster.
Once installed, open up PosteRazor and follow the prompts to upload your image. Click on the "Custom tab" under Paper Format, and enter in the dimensions you would like your final image to be. My state of Ohio was approximately 12 inches by 12 inches. Hit the "Next" button a few times until you get to the last step, where you save your poster. Save it the desktop, then print it out. It will print out on multiple sheets of standard 8.5 x 11 inch paper. Then, tape these sheets together to create your map template. Draw a heart (use a stencil) around the city you love, right there on the map.
5. Cut out the state string art pattern, and center it on your wooden board. You can add a little tape around the edges to keep it from moving.
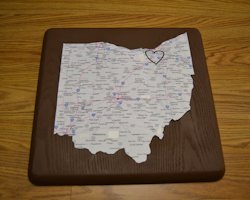
6. Beginning with the heart, pound nails around the outline of the heart. You do not want the nails to go all the way in, but have them in enough so they do not bend with pressure. Try to make the nails spaced evenly, and pounded in to about the same height all around. For the heart only, you need to have the nails as close together as you can.
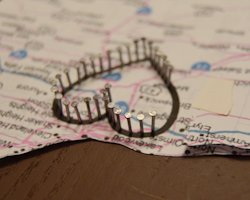
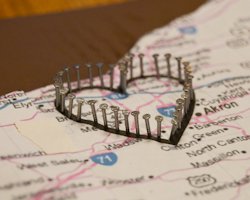
7. Begin to hammer in nails around the outline of the state now. Here you can space the nails out a little further from one another. I tried to keep the spacing at about 1 cm. Take your time. Small nails don't take much time to pound in.
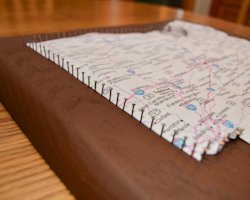
7. Begin to hammer in nails around the outline of the state now. Here you can space the nails out a little further from one another. I tried to keep the spacing at about 1 cm. Take your time. Small nails don't take much time to pound in.
8. Next, carefully peel off the paper. Even if the nails are through it you should be able to tear it off and clean off the paper bits near the base of the nails. You will be left with an outline of your state, in nails!
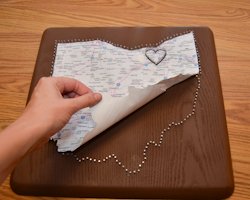
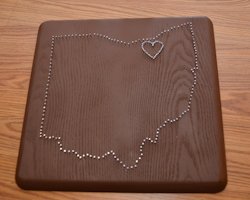
9. Adding the string is the fun part! I chose a pretty silver string, but you can try gold or any color. Begin at one of the outside nails. Tie the string tightly around a nail and knot it a few time to secure. Cut off the tail. You are ready to start! The basic winding process is like this: Bring the string to the center heart, wrap it once around a nail, then bring the string back out to the outside nail. Keep on doing that, working your way around the state. Each outside nail gets wrapped only once, but the nails around the heart will have to get wrapped a few times each. Use your judgment on what looks best. Keep tension on the string the whole time so you keep the strings nice and tight. I was able to go around the whole state with one roll of string (with some left over).
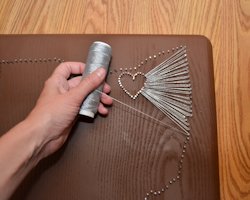
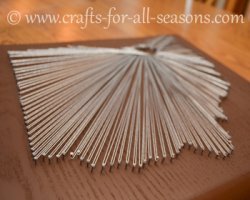
9. At the end, tie the string around the nail and knot tightly, then cut off the tail. Your state string art is now ready to hang!
Here's Something Else to Try
City Skyline String Art
by Crafts For All Seasons
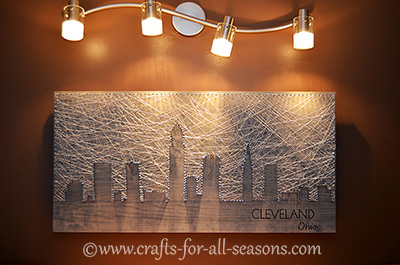
Here I traced the city skyline of Cleveland on a piece of stained wood, and added nails and string art to the outsides of the design, instead of the city skyline itself. Nails were hammered in along the edges and I wound the string around in the nails in no particular pattern at all, just tried to fill in the space.
Would you consider a small donation?
You will receive my craft ebook as a thank you!
Every little bit helps! If you are enjoying this site, would you consider making a small donation? I use the extra money to help with the cost of craft supplies! With any $5.00 donation or more, you will receive my 650 page ebook full of 178 craft tutorials from this site. Thank you for your consideration!
Click here to learn more about the book, and to make a donation.


Facebook Comments
Have Your Say About What You Just Read! Leave Your Comments or Questions Below.