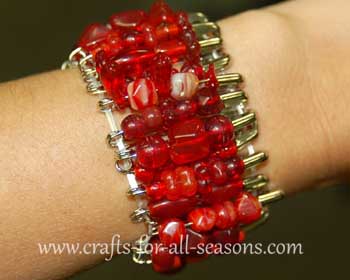
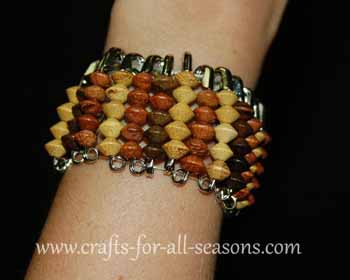
Beaded Bracelet Craft
Safety Pin Crafts
This beaded bracelet craft makes a wonderful gift for your Mother or any special woman in your life. These also sell well at craft bazaars!
They are made from beads which are threaded on to safety pins. The safety pins are then threaded on either end with some elastic cording to hold them together.
Different shaped and different colored beads can be used to create drastically different results, I show two examples below.
Experiment and let your creativity take over. This is a simple craft, and most elementary school kids are able to assemble these bracelets easily.
There are only three materials needed to make these: safety pins, beads, and elastic cording. You can also make these into choker necklaces. To do this, do not use the elastic cording. Use thin jewelry cording or fishing line, and add on jewelry end clasps of your choice for securing around your neck.
All the step by step instructions follow.
Materials Needed:
- Size 2 Safety Pins (about 25 for a small bracelet, 30 for a larger bracelet) NOTE: smaller safety pins could also be used, but you also will need to use smaller beads)
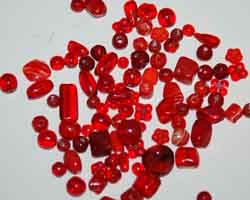
- Assorted beads of your choice (experiment with glass beads, wood beads, pony beads, etc.) For the red bracelet, I found a large package of assorted red glass beads of different shapes and styles.
- Elastic bead cord
- Super glue
Instructions:
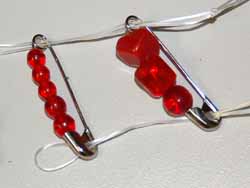
1. Begin by threading on the beads to each safety pin. Experiment with some different techniques. For the red bracelet shown in this example, I made each beaded pin look different. One pin had a long bead, followed by a round one, followed by a long one again. The next safety pin had all small ones threaded on it next, followed by a safety pin with three large stone like beads. For the wooden beaded bracelet, I made each pin threaded with the same color of beads, but alternated pins with different colors. There is no right way, just be creative and thread all your safety pins, then close them all up.
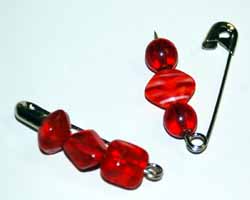
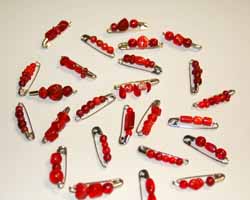
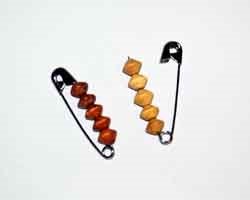
2. Next, lay all your safety pins in a row as they will be in the finished bracelet. Using the elastic cording, begin to thread the cord through the bottom loop of each safety pin. I like to thread a double stranded elastic cord for more durability.
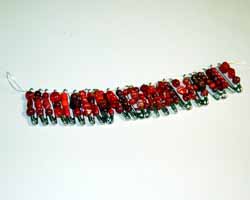
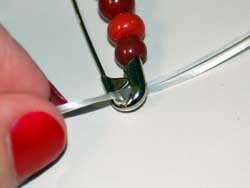
3. Next, thread another length of elastic cording through the top of
each safety pin. Thread it through the little hole that is in the head
of each safety pin.
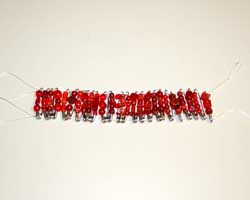
4. Holding on to the ends of the elastic cording, gently flip the beaded bracelet craft over, and curve them around in a bracelet shape, and tie the ends of the elastic cording to each other to make a square knot, then double knot it again. It is a good idea to put a drop of super glue on the knot to help secure it.
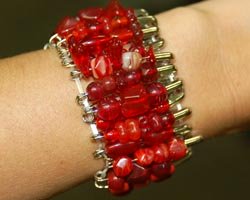
5. Snip off the ends of the elastic cording and the beaded bracelet
craft is ready to wear or give as a gift.
Would you consider a small donation?
You will receive my craft ebook as a thank you!
Every little bit helps! If you are enjoying this site, would you consider making a small donation? I use the extra money to help with the cost of craft supplies! With any $5.00 donation or more, you will receive my 650 page ebook full of 178 craft tutorials from this site. Thank you for your consideration!
Click here to learn more about the book, and to make a donation.
Home › All Occasion Crafts › Beaded Bracelet Craft
Home › Mother's Day Crafts › Beaded Bracelet Craft
Home › Crafts For Adults › Beaded Bracelet Craft
