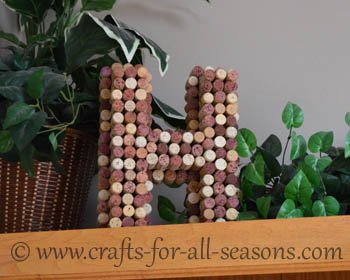
Wine Cork Letter
Got extra wine corks laying around? Put them to good use by creating this monogram, which makes a unique accent for your home. Placed on a shelf or a mantle it will definitely make a statement.
All you need is a hot glue gun, a whole mess of wine corks (a great excuse to drink wine), and the background for the letter itself. Craft stores sell these letters already cut out of wood, and in many different sizes. You'll want to work with a pretty big letter. If its too small it will be hard to fill it up with wine corks, so keep that in mind as you are shopping. If you are super crafty, you could also cut out your own letter from wood or sturdy cardboard.
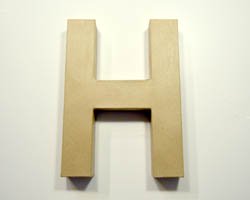
I happened to find a cardboard 3D version of the letter H which I used for this project. Keep in mind you can also use a flat letter. You just won't be doing step 4 below.
Materials Needed:
- The letter itself (either cut from flat wood/sturdy cardboard, or a 3D version)
- A bunch of wine corks (you'll probably need more than you think, wine cork projects are always like that)
- Hot glue gun and many, many glue sticks (again, you'll need more than you think)
Wine Cork Letter Instructions
1. To make one of these wine cork letters, you are going to need to purchase the letter of your choice at your local craft store. Cut out wood letters are readily available in different sizes, or you can cut your own from wood if you have a band-saw. I picked out a 3D cardboard letter that was ready to embellishment. My letter was 12 inches tall.
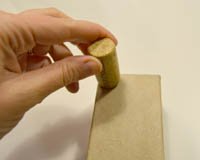
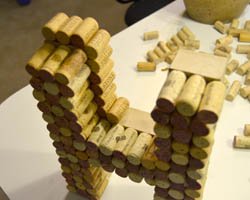
2. Gather all your wine corks that you have been saving, in one place. You want to use wine corks that are all about the same length. Go through them and sort them out by size. If they are too short, do not use them. Beginning at a corner of your letter, apply a dollop of hot glue on the end of the cork and place it on the letter, as shown.
3. Continue to glue the corks on the letter, row by row, until you fill up the entire letter. Take turns gluing some of the corks with the wine stain up, and some with the wine stain down, to create an interesting, patterned look.
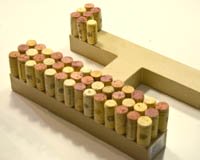
4. If you are gluing the corks on a flat letter, you are done once you fill it all up. Since I was working with a 3D letter, I didn't like how the thick sides of the letter were showing. I decided to cover the sides with more corks. To do this, just keep gluing corks on, but this layer will sit slightly behind the others. You will be adding the glue to the side of the corks instead of the ends.
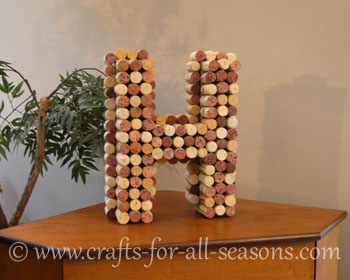
5. Place your wine cork letter on a shelf, mantle, or hang on your door. Just be sure to protect it from direct elements (for indoor use only). I hope you enjoyed this tutorial! If you decide to make one of these, send me your finished craft photo and I'll post it below.
6. Once you have a diagonal stripe two rows thick, skip two more diagonal rows (which will be for the white yarn) and begin another two rows of red. Continue this way until half of the coaster is done.
Would you consider a small donation?
You will receive my craft ebook as a thank you!
Every little bit helps! If you are enjoying this site, would you consider making a small donation? I use the extra money to help with the cost of craft supplies! With any $5.00 donation or more, you will receive my 650 page ebook full of 178 craft tutorials from this site. Thank you for your consideration!
Click here to learn more about the book, and to make a donation.
Home › All Occasion Crafts › Wine Cork Letter
Home › Recycled Crafts › Wine Cork Letter
Home › Crafts for Adults › Wine Cork Letter
