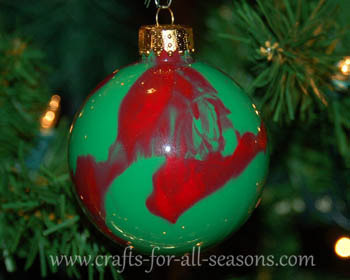
Paint Swirled Ornament
Decorating Ball Ornaments
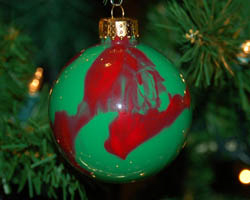
These paint swirled ornaments are truly a beautiful way to decorate clear glass ball ornaments.
Clear ball ornaments can be found in craft stores and in the dollar stores around the holidays. These can be decorated in many different ways. Here I show how adding some acrylic paint inside the ornament can have a beautiful effect. You can use colors to match the decor or theme of your Christmas tree. Friends and family will find it hard to believe you made these yourself, they almost look too good to be "homemade"!
If you would like to see other ways to decorate clear glass ball ornaments, check out these pages too: snowflake ornament, tinsel ornament, and sparkling gem ornament.
Materials Needed for Paint Swirled Ornaments:
- Clear glass or plastic ball ornament
- Vinegar or rubbing alcohol
- a few colors of acrylic paint
- a tissue, napkin, or paper towel
Paint Swirled Ornament Instructions
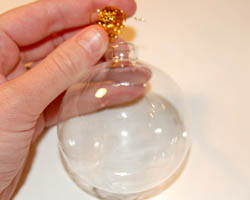
1. First the inside surface of the ball ornament needs to be prepped so that the paint stays on and does not crack over time. Remove the top covering to the ornament and set it aside. Pour a small amount of rubbing alcohol or vinegar inside each ball. Swirl it around so it coats the entire surface. Pour out the liquid and allow the ball to dry completely before beginning.
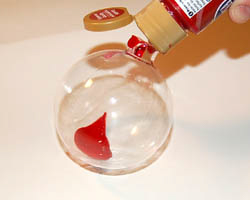
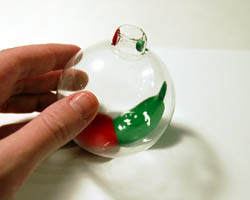
2. To begin decorating, dribble some
acrylic paint inside the ornament. Add a good amount, and
swirl it around a bit.
2.
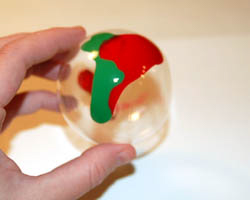
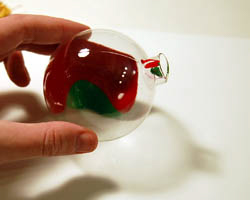
Next, add in another color of paint (here I'm adding green).
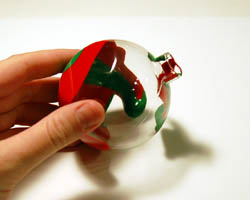
Swirl these colors around by rolling the ornament between
your hands. Fill in gaps by dripping in some more paint in
that area, as best as you can.
3.
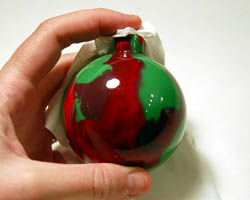
When about half of the inside of the bulb is covered, take a
tissue and cover the top opening with it, and hold it tight with your
finger. Then, give the ornament a good shake or two,
carefully checking progress in between shakes. Try to get all the glass
covered. You want to shake to get a good swirl effect, but
not too much that the colors become completely mixed and change color.
4.
Allow the paint swirled ornament to dry well with the ornament cover off,
then replace the cover and hang your beautiful paint swirled
ornament on the Christmas tree, or give away as an impressive gift!
Suggestions by Others
Helpful
Hints
by SD (Florida)
"I have made 100's of these, and would like to share some tips. I only use a 4" ornament. I do not wash them. Currently I am doing 132. I have bought LOTs of paints.
To drip the paint in like suggested will not give you the best look. You need to pick 2 or more colors that you want to use, open the cap and be ready to work quick and don't be afraid to use your paint. Start with one color, squirt a line down the side, and keep turning the ornament and do the same thing with that color and continue with the other colors you chose for that ornament. Making sure you let each color hit the previous color so it can pull the colors. At the bottom you will see the paint pooling, start rolling or and up or down motion with the ornament so the paint covers all the ornament. The colors will pull from each other and have a lovely effect.
Turn upside down in a trimmed down foam cup, you may need to use the paint that runs out later. Now, about every 1/2 hour or so turn the ornament (either upside down or right side up).
Your ornament will change its look quite a bit. It will take you some time to learn what the paints will do but in time you will love what your seeing. If you hold your ornament to the light and look into it and see the paint dried thin, take some of the paint that drained in the cup and pour it back in and let it roll. Drain again and roll again. You should have your ornament right side up after 24 hours because it will take days to completely dry.
You should never SHAKE the ornaments with the paint in them, all this does is mixes the color and you get an ornament with one color and that's no fun. Silver, gold, black paints run thin, you may need touch ups (pouring the cup paint back in) with those colors. Don't be afraid to waste a little paint, its just paint and the ornament will last generations.
They are
that lovely. My first set is over 10 years old, every year when I put
them up, I ohhhh and awwwww over them, saying oh this one is my
favorite with each one. They will pass thru my family. I am now making
them for my gift for gift exchange at my office, they are a big hit.
Good luck and have fun."
Tips
for Kids
by Anonymous
I decided to do this for my daughter's 1st grade class. Because of the age of the kids, I did not want to do acrylic paint. I was worried about stained clothing. We used Crayola Finger paint. They turned out awesome! The kids really enjoyed this activity and it has held up for 2 years so far!"
Would you consider a small donation?
You will receive my craft ebook as a thank you!
Every little bit helps! If you are enjoying this site, would you consider making a small donation? I use the extra money to help with the cost of craft supplies! With any $5.00 donation or more, you will receive my 650 page ebook full of 178 craft tutorials from this site. Thank you for your consideration!
Click here to learn more about the book, and to make a donation.
Home › Christmas Crafts › Painted Swirled Ornaments
Home › Crafts for Teens › Painted Swirled Ornaments
Home › Crafts for Adults › Painted Swirled Ornaments
