Valentine's Day Heart
This Valentine's Day heart looks really pretty hanging on a door, in a window, or as a wall decoration.
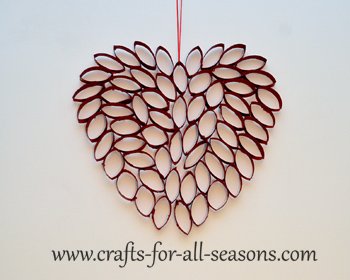
I was inspired by the intricate quilled heart designs I have seen, and I thought I would try something similar out of a paper tube.
Here, I used a single cardboard tube from a center of a wrapping paper roll. I cut the tube into 1/2 inch rings, and glued them together to form this heart. After a coat of red spray paint, and tying on a ribbon, it was done! The hardest thing about this is simply figuring out how and where all the rings will fit together, but I give tips for this in the step by step directions below. This craft is suitable for adults or older teens, as young children may find it difficult to position all the rings correctly.
Materials Needed:
- Cardboard tube from the inside of a wrapping paper roll (or several empty toilet paper rolls or paper towel rolls)
- Ruler or yard stick
- Marker
- Scissors
- Glue
- Spray paint (red, pink, or white look great)
- Ribbon for hanging
Valentine's Day Heart Instructions:
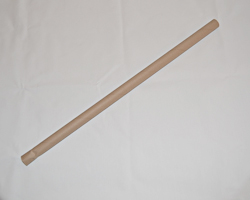
1. It all starts with the cardboard paper tube from the inside of a wrapping paper roll. But keep in mind, you can also use paper towel tubes or toilet paper tubes. You will just need more than one. This 30 inch long wrapping paper tube made the entire Valentine's day heart.
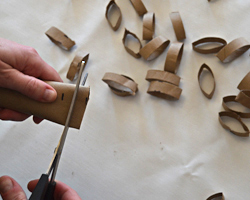
2. Measure off equal segments with a ruler and mark them. I marked off 1/2 inch thick segments and was able to make 60 of them.

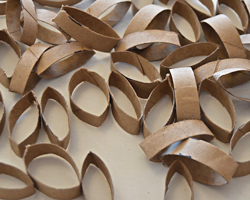
3. Cut each ring off at the mark. You will have to squeeze the tube to do this, and that is fine. It makes each ring have a football shape which you want to have anyway.
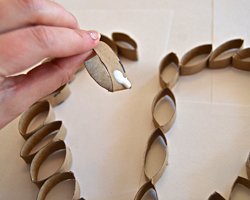
4. Place some scrap paper or newspaper on your work surface to protect it. Begin assembling your heart, using the photos below for guidance. Begin my creating the outside of the heart. Do not glue anything together yet.
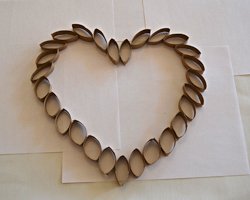
5. Create a "line" down the center of the heart by placing a few rings vertically, connecting the top center of the heart with the bottom center of the heart, as shown.
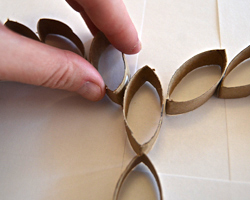
6. Once you have this laid out, and it looks nice and even, you can begin gluing. However a little tip first: I decided to first place all my rings inside to make sure I would have enough rings. If you don't have enough, you will need to either cut more rings, or reduce the size of your heart. It is easier to do that now before you get started gluing. I used white Elmer's Glue-All. I like Elmer's Glue All because it has a strong bond, yet doesn't cure immediately so you can still move things around if you have to. Place a drop of glue on the side of each ring to attach all the rings together.ce.
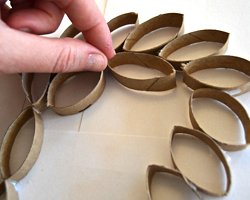
7. Now you can begin gluing and placing, rings in the middle to fill in the heart. I didn't pay as much attention to the orientation of each ring, but instead positioned it to fill in the gap the best.
8. Allow the Valentine's day heart to dry well. Then, gently peel off the paper on the back (the glue most likely will have dripped through and bonded the paper to your heart). Take your time and cut away any paper that stuck to the heart.
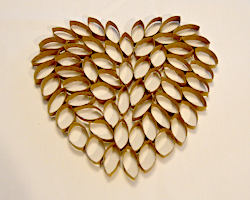
9. In a well-ventilated area, place your heart on newspaper. Give it a nice coat of spray paint in the color of your choice. I gave my heart two coats of spray paint, on each side of the heart, allowing it to completely dry in between coats.
10. Add a ribbon to the Valentine's day heart. This really looks pretty in a window or hanging on a door. Enjoy!
Would you consider a small donation?
You will receive my craft ebook as a thank you!

Every little bit helps! If you are enjoying this site, would you consider making a small donation? I use the extra money to help with the cost of craft supplies! With any $5.00 donation or more, you will receive my 650 page ebook full of 178 craft tutorials from this site. Thank you for your consideration!
Click here to learn more about the book, and to make a donation.
Like this Site? Please share the Love!
You can follow me here:


I invite you to subscribe to
The Creative Crafter
The Creative Crafter is my quarterly newsletter that is emailed four times per year. It lets you know about any new additions to the site. As a bonus, you will get a new craft project in your email that only subscribers get to see.