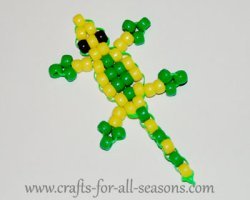
Lizard Lanyard
Bead Projects
Lizard lanyards are fun to make! This is a great craft project for tweens and teens.
You can add a ring to the end of the lizard to become a zipper pull or a key chain.
All you need are some pony beads and lanyard (plastic lace) or cord. I learned this craft from my niece and nephew, who had fun making many different color combinations for their lizards.
This would make a great camp craft for teens!
Materials Needed for one Lizard:
- Approximately 3 yards of lanyard/plastic lace (or yarn, ribbon, any cord of choice)
- 27 yellow pony beads (or color of choice)
- 22 orange pony beads (or color of choice)
- 2 black beads
- Scissors
Lizard Lanyard Instructions
Note: In these instructions, I will refer to yellow and orange beads since that is the color combination I chose for this lizard. Please substitute any color combination you choose. The lizards look best with two contrasting colors. It is helpful to refer to the pattern below. Click here to print out the pattern.
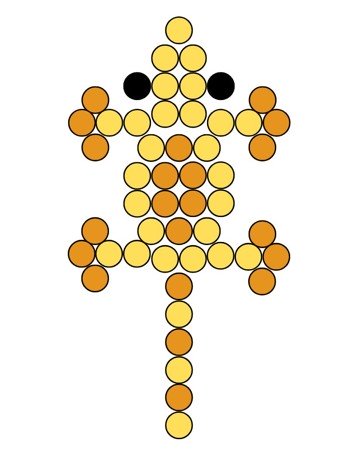
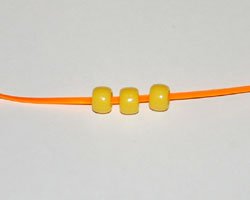
1. Begin by stringing on three yellow beads on to the cord. Thread the beads to the middle of the cord. Next, bring the two beads on the outside, below the center bead to form a triangle. To get this shape to stay, thread the other side of the cord back through the bottom two beads so they are double-threaded. Use the photos to help. Then, tighten the cord by pulling the ends.
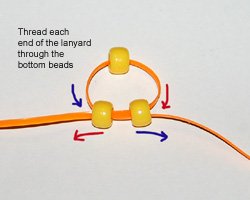
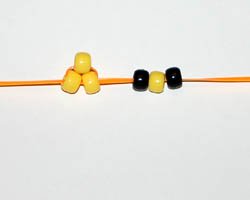
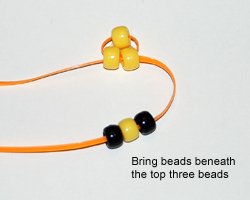
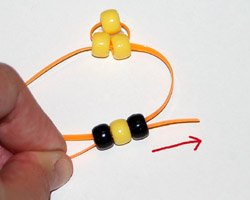
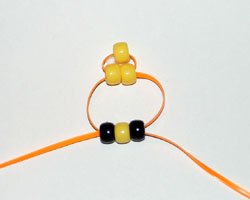
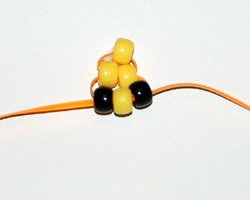
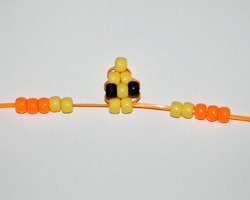
2. Next, thread on black bead, yellow bead, and black bead on the right side of the cord (first photo). Bring these beads beneath the center triangle you just made (photo 2). Then, take the left end of the cord (that doesn't have beads threaded on) and thread this back through all three beads so they are double-threaded (photos 3 and 4). Then, tighten the cords up. This is the threaded procedure you can follow to make the entire lizard. Just follow the pattern above. At first the lizard head will not seem "tight" and will be loose. Just take your time tightening as you go. Once you add the legs (the next step) everything starts to "tighten" up.
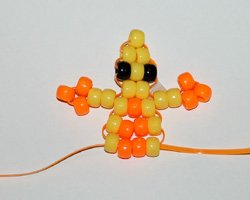
3. To make the legs, thread two yellow beads,
followed by three orange
beads. Do this on each side of the cord (photo 1). Bring the same end
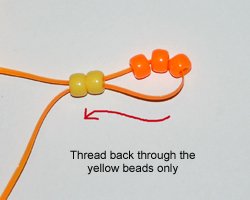
of the cord back through the yellow beads only (photo 2). Do this on
each side (photo 3).
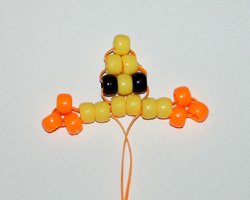
4. Continue threading beads according to the
pattern. Add on the bottom
legs the same as you did with the top legs.
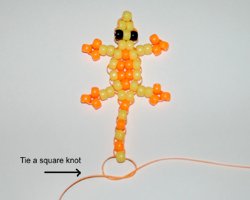
5. When you finish the lizard's tail, tie a double knot to secure, and cut off the excess lanyard cord.
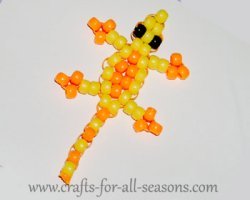
6. Your lizard lanyard is complete!
Would you consider a small donation?
You will receive my craft ebook as a thank you!
Every little bit helps! If you are enjoying this site, would you consider making a small donation? I use the extra money to help with the cost of craft supplies! With any $5.00 donation or more, you will receive my 650 page ebook full of 178 craft tutorials from this site. Thank you for your consideration!
Click here to learn more about the book, and to make a donation.
Home › All Occasion Crafts › Lizard Lanyard
Home › Summer Crafts › Lizard Lanyard
Home › Crafts for School Age Kids › Lizard Lanyard
Home › Crafts for Teens › Lizard Lanyard
