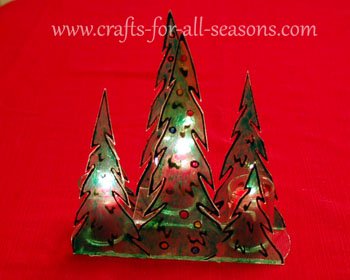
Plexiglass Craft
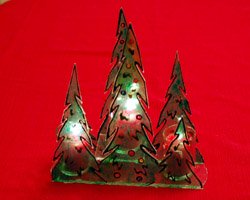
This plexiglass craft idea comes from my talented mother-in-law. She loves her band saw and cuts these trees from store bought plexiglass sheets. She paints them and sells them finished, but has also had luck selling them as "paint your own" craft kits!
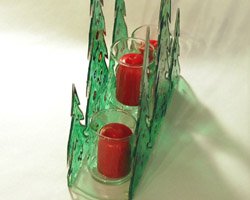
You will need a band saw, and a sheet of plexiglass. Plexiglass can be found at home improvement stores. Once they are cut and painted, little votive candles are stacked behind the design, which are beautiful when lit. Try cutting different types of designs, such as a house, or snowmen in a field. This craft can be used for any holiday with your imagination!
Materials Needed:
- Plexiglass sheet, approximately 20 inches by 23 inches for the design I cut.
- A band saw
- Glass paint (enamel) in colors of your choice
- Paint brush
- Outline paste (for a leaded glass effect on glass or plastic). This is usually sold by the glass paints and it comes in a squeeze tube.
- Glue, industrial strength (I use E-6000)
- 3 votive candles/holders, or 3 battery operated candles
Plexiglass Craft Instructions
1. Begin the plexiglass craft by making any pattern you choose on paper, and tracing it with a marker on to the plexiglass. Cut out the pattern with a band saw. For this particular project there are three trees, which were extremely easy to cut. To do this, three triangles shapes were cut (but attached together near the bottom). Then the "notches" were cut into the sides of the tree (the triangle shapes) with a band saw. The tallest tree was 10 inches tall, and the width of the three trees was 10 inches. Whatever your pattern is, you will need to cut two plexiglass shapes of the pattern, which will both be exactly the same.
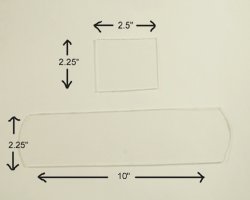
2. Next, cut the following two rectangles from the plexiglass: 2.5 inches by 2.25 inches, and a 10 inch long rectangle by 2.25 inches. The 10 inch long bottom piece should be as long as your design, so change the size if necessary. The little square at the top help adds more support and allows for a tealight to be placed a bit higher than the others.
3. Using the leaded paint first, outline the trees and add ornaments if desired. Only paint one side of the plexiglass, but do both patterns. Allow to dry completely.
4. Paint both sets of plexiglass (again, one side only) with the glass enamel paint.


5. Glue the small square
to the middle of the tree, approximately 1.5 inches from the bottom. Glue the
long rectangle along the bottom edge of the pattern. Allow to dry.
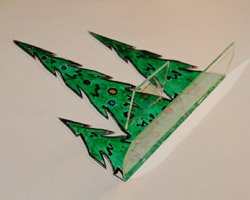
6. Glue the other plexiglass pattern to the small insert rectangles to complete the craft, and allow to dry.
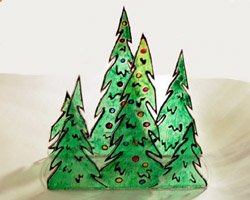
7. Place a votive along each edge, and one on the middle tier. Enjoy!
Would you consider a small donation?
You will receive my craft ebook as a thank you!
Every little bit helps! If you are enjoying this site, would you consider making a small donation? I use the extra money to help with the cost of craft supplies! With any $5.00 donation or more, you will receive my 650 page ebook full of 178 craft tutorials from this site. Thank you for your consideration!
Click here to learn more about the book, and to make a donation.
