Storybook Cricut Card
Cricut Birthday Card
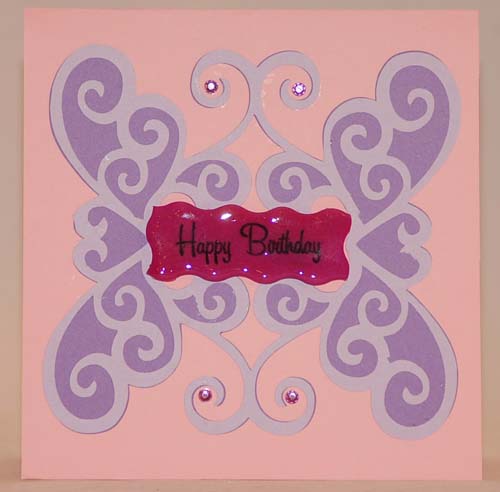
This Storybook Cricut card was made for my friend Heather.
I just love all the scrolls and intricate designs on the Storybook cartridge, so I had to try this one out. The embellishment in the middle was made using a stamp I had that said "Happy Birthday".
I enhanced the stamped paper clipping by covering it with ultra thick embossing powder and giving it a glossy appearance with my heat gun. To see how I made this card, read on.
Materials Needed:
- Storybook Cartridge
- 11" x 5.25" pink card stock for card base
- Dark purple card stock
- light purple card stock
- Scrap of pink card stock
- 4 glitter gem embellishments
- "Happy Birthday" stamp (or print it with your computer)
- Ultra Thick Embossing Powder, embossing stamp pad, and heat gun
- Paper trimmer and or scissors
- Glue stick or pen (for intricate designs I use a fine-tipped Zig pen)
Quick Summary:
- Card is 5.5" x 5.25"
Storybook:
- Scroll and its background is cut at 4.5"
- Happy Birthday tag measures 2.5"
Detailed Instructions for Making this Storybook Cricut Card:
1. Fold a 11" x 5.25" piece of pink card stock in half to create a 5.5" x 5.25" square card.
2. Using the Storybook cartridge, load the dark purple paper on a mat. Select the scroll background by pressing "shift", then select the number "2" (button 2). Next press the "accent/blackout" special feature button. Cut at size 4.5".
3. Load the light purple paper on to a mat. Select the scroll by pressing "shift", then select the number "2" (button 2). Next press the "accent/frame" special feature button. Cut at size 4.5". Assemble the card by gluing all the components on the front of the card.
4. Glue four glitter gem embellishments to the inside scrolls on the card.
5. Stamp or print "Happy Birthday"on a piece of pink card stock. Cut the tag with fancy edge scissors, or use a simple design on your Cricut. My tag measured 2" across.
6. Stamp the entire front of the tag on the embossing pad. Hold the tag in the corner with some tweezers, then coat completely with ultra thick embossing powder. Apply heat with the heat gun until the powder melts into a glossy coating. Allow to dry, then glue the "Happy Birthday" tag to the center of the Cricut birthday card.
Would you consider a small donation?
You will receive my craft ebook as a thank you!
Every little bit helps! If you are enjoying this site, would you consider making a small donation? I use the extra money to help with the cost of craft supplies! With any $5.00 donation or more, you will receive my 650 page ebook full of 178 craft tutorials from this site. Thank you for your consideration!
Click here to learn more about the book, and to make a donation.
Home › Cricut Craft Projects › Storybook Cricut Card


