Yarn Knot Mason Jar Candle Holder
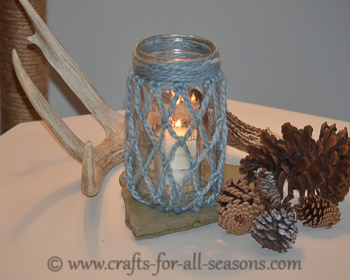
This yarn knot mason jar candle holder can be made to match any décor in your house. I absolutely love the variety of yarn that is available in the craft stores. Every color you can think of, from thin twine to thick and chunky yarn! The look you choose is up to you. For example, try using jute to create a nautical look, or fuzzy yarn to create a soft look.
This project is surprisingly easy to do, and takes less than an hour. Lengths of yarn are tied to the top of the jar and then knotted together, using simple square knots. With my simple step by step photo instructions, you can make this in no time!
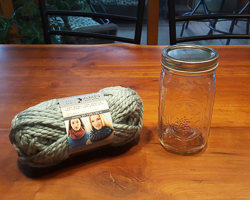
- mason jar (or any size jar)
- yarn of your choosing
- scissors
- ruler to measure
- Adhesive (white glue, glue gun, craft glue, etc.)
- votive candle to put inside (tip: use a glass votive holder inside the mason jar to contain melted wax)
Yarn Knot Mason Jar Instructions
1. This yarn knot mason jar project begins at the mouth of the jar, where we will create a yarn circle and tie other pieces of yarn to this circle. Cut a length of yarn to wrap around the circumference of the jar top, which will create the proper size circle to adhere the rest of yarn to. 16 inches of length is a good start. Do not tie it around the jar yet, this step is simply for measurement. You will want some excess yarn for tying it later, as shown in the bottom right photo. Lay the yarn flat on the table.
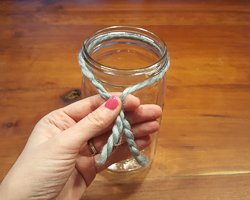
2. Next, cut ten pieces of yarn, each about 32" in length.
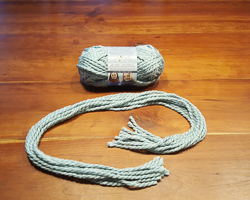
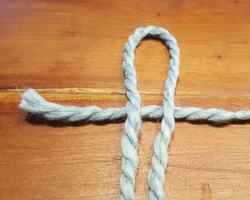
3. Fold each 32" yarn section in half, and lay it over the 16" section of yarn that you measured around the lid of the mason jar, as shown.
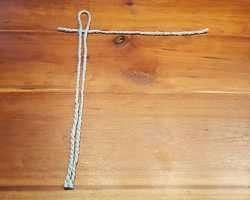
4. Slide the ends of the yarn section through its loop to form a knot - see the photos below for help.
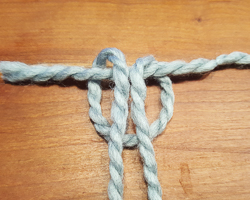

5. Continue adding on the other 9 sections of yarn that were cut, and knot them as explained in step 4. Spread the knots evenly along the length of the yarn, approximately one inch apart.
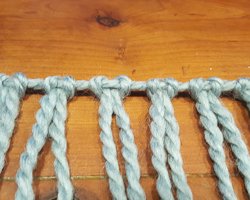
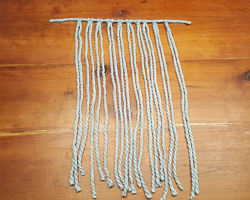
6. Once all ten yarn lengths are tied on, wrap the top connecting 16" piece of yarn around the mason jar top. Secure with a double square knot and secure with glue if you like. Cut off any excess yarn from the knot tail.
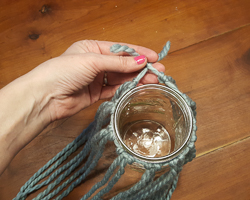
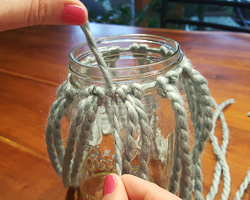
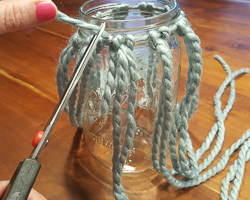
7. Next is the knotting steps. The knotting process is really pretty easy. Begin by spreading all the yarn sections out from around the mason jar....
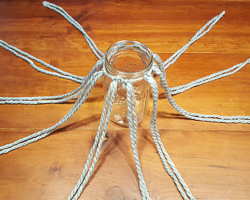
8. Notice how the yarn strands are in pairs. Take one yarn strand from one pair, and bring it next to a yarn strand from a neighboring pair. Begin a simple, loose overhand knot as if you were tying your shoelaces. Create this about one inch down from the rim of the jar.
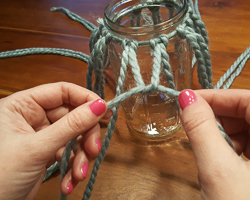
9. Finish off the knot by tying the second half of the square knot (repeat step 8). Notice that you should be leaving about a one inch gap for the knot from the top of the lid.
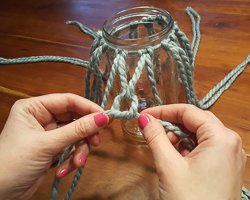
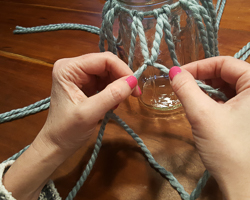
10. Continue working around the circumference of the jar lid, creating knots, approximately one inch away from each other on all sides. The photo below shows that the "first layer" complete.
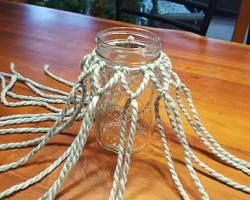
11. For the second row, once again take opposite strands from opposite groups, which will create a diamond shape. Square knot these strands, and try to make everything even by continuing to make the knots about 1" apart.
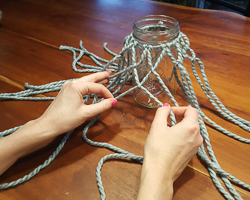
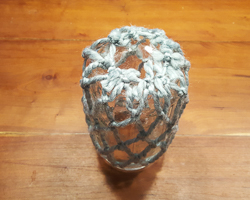
12. Continue to knot diamond shapes through each layer until you reach the bottom of the jar. You will have a bunch of "yarn tails" hanging from the bottom of the jar.
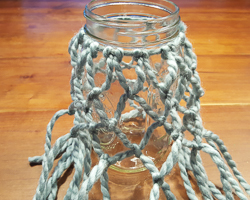
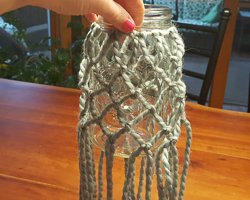
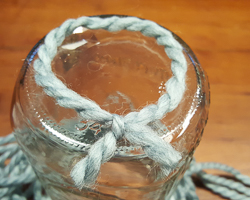
13. To finish off the project, measure a small piece of yarn that will cover the inside bottom circumference of the jar, as shown. Tie this length of yarn to itself to create a circle. The yarn circle will be the anchor that all the side yarn strings tie too. The circle should be slightly smaller than the circumference of the jar to keep the knots secure around the jar.
Take your time to secure all the side yarn strings to the bottom yarn circle, square knot, and cut off the excess yarn with scissors.
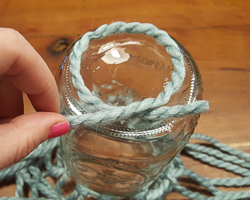
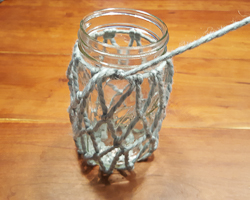
14. To finish off this project, take a length of yarn and knot it to the top yarn strand that wraps around the top of the jar. Next, wrap the length of yarn around the top of the mason jar several times to cover the rim of the jar (where the screw threads are for the lid). Tuck the end of the yarn under the other strands and secure it with a bit of glue.
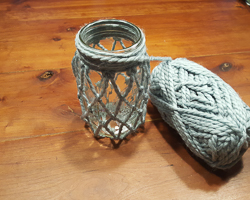
15. Add a votive candle (in a votive candle holder to keep your yarn knot mason jar free of wax) and enjoy!
Would you consider a small donation?
You will receive my craft ebook as a thank you!
Every little bit helps! If you are enjoying this site, would you consider making a small donation? I use the extra money to help with the cost of craft supplies! With any $5.00 donation or more, you will receive my 650 page ebook full of 178 craft tutorials from this site. Thank you for your consideration!
Click here to learn more about the book, and to make a donation.


